Around 40,000 search queries are processed by Google each second on average — that’s what Internet Live Stats reports.
Breaking the number down, 3.5 billion Google searches are conducted every day. And surprisingly, the majority of internet users go online to research brands and products.
That’s why SEO optimisation and conversion tactics are more crucial than ever. Yet, even with top-notch strategies, many business owners find their traffic trickles in like water from a leaky tap.
Have you experienced the same? If yes, it’s time to turn to Google Search Console—the best and most important tool for businesses to monitor their site’s performance on Google.
But how do you get started or use Google Search Console to increase your organic search traffic? Frankly, the platform is easy to use, and there are several ways to set it up.
Continue reading this guide to learn how to correctly set up Google Search Console!
Want to receive updates? Sign up to our newsletter
Each time a new blog is posted, you’ll receive a notification, it’s really that simple.
What Is Google Search Console?
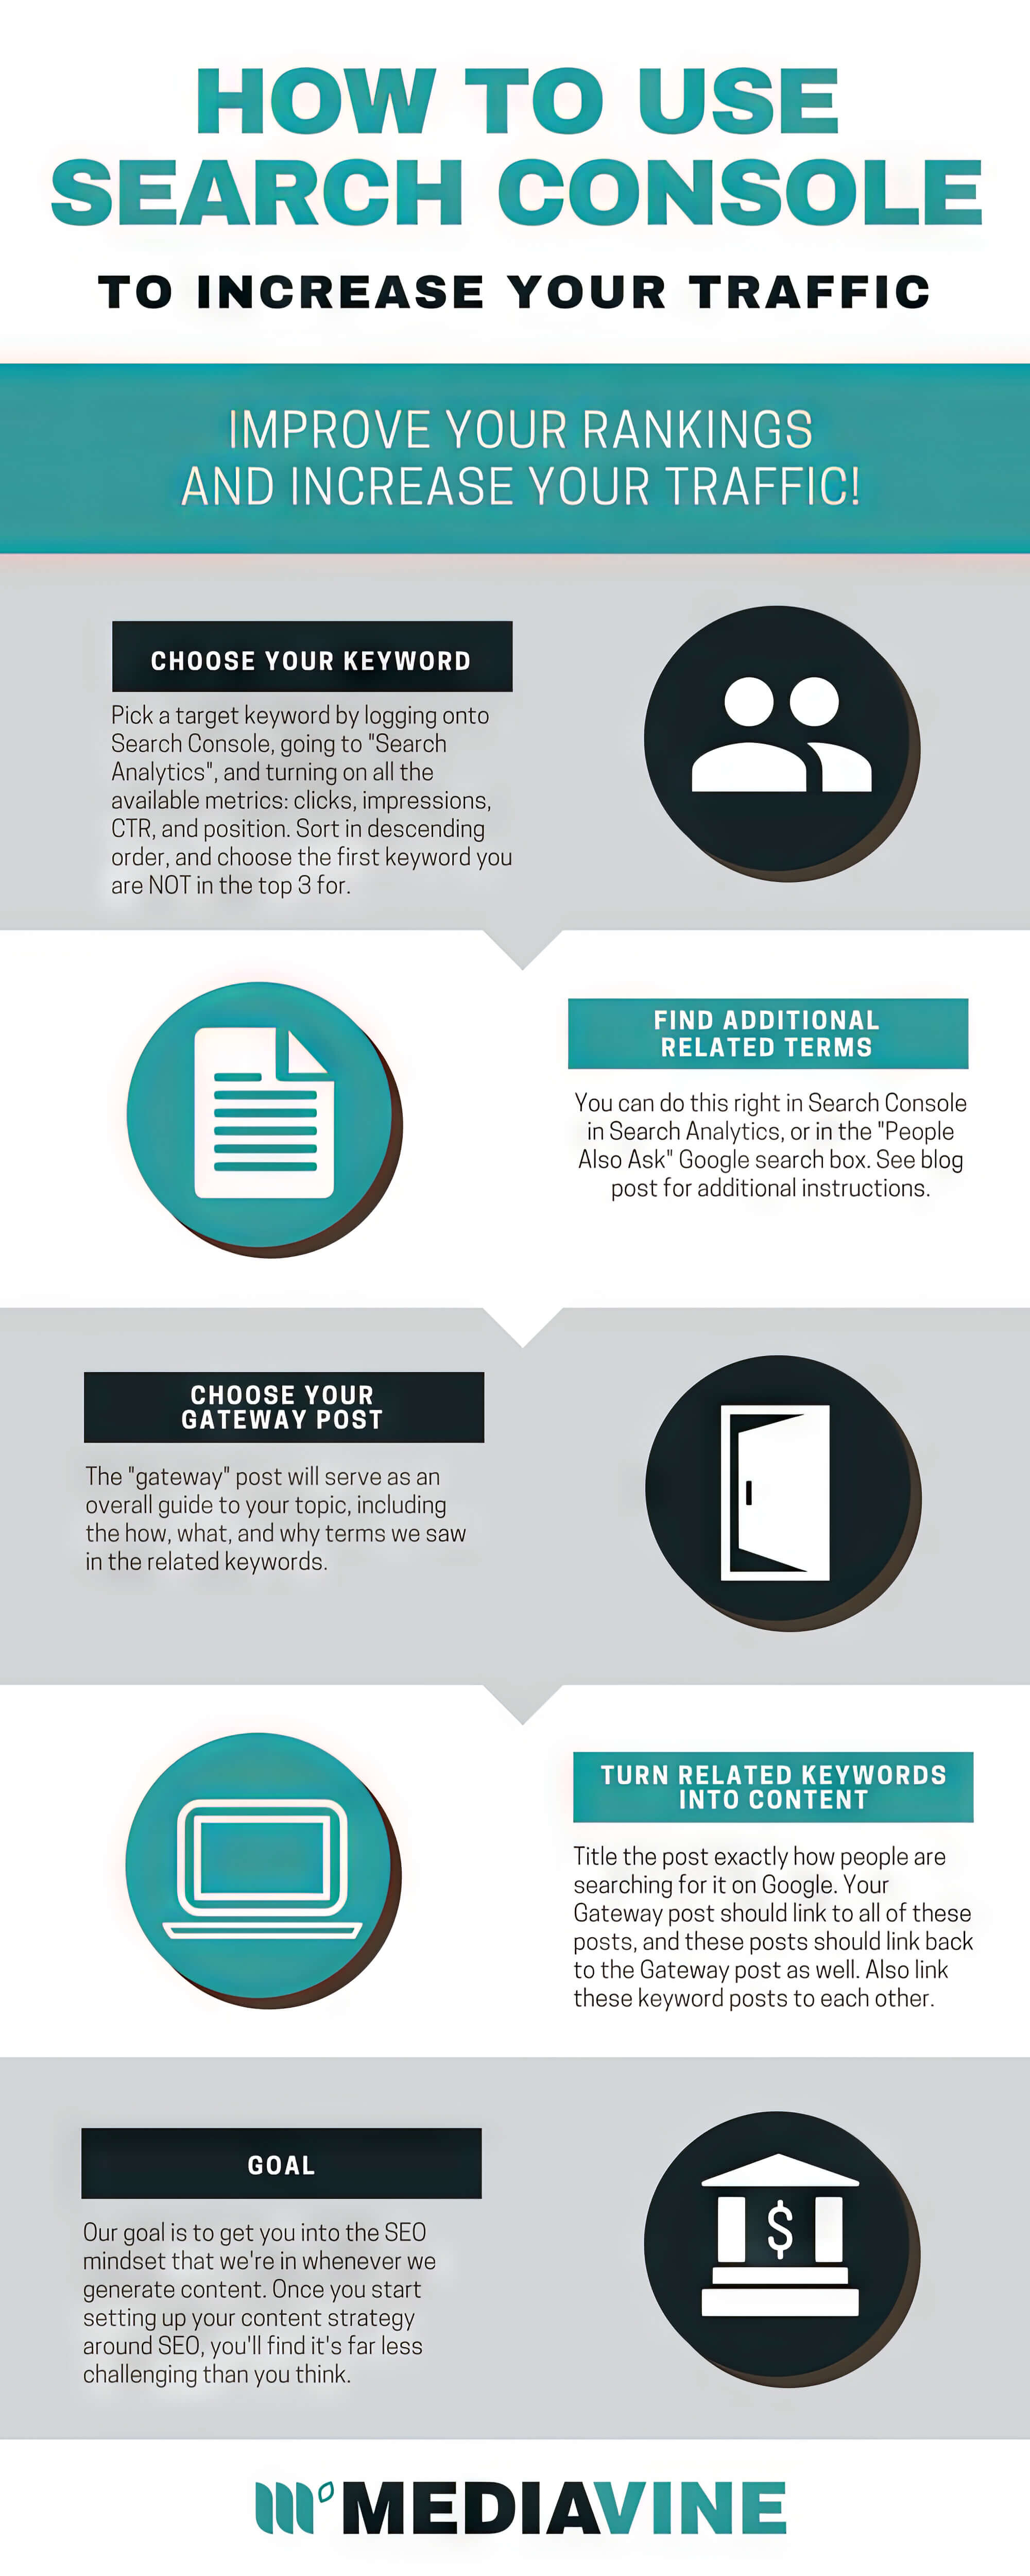
Initially called Google Webmaster Tools, it is a web service or suite of tools that Google offers. Launched nearly 15 years ago, this free service allows business owners and webmasters to monitor or track the performance of their or their client’s site relative to Google search.
It also uncovers valuable information about indexing, security, and site errors that could potentially hamper your site’s search performance. By offering an overview of metrics, the data offered by Google Search Console is real-time and cutting-edge. It is crucial for web search optimisation, making it an integral component in the SEO stew.
What Is Google Search Console Used For?
Though Google’s Search Console is a free tool, it’s one of those powerful tools that will help you level up your SEO game. Web admins and site owners get access to the following:
- Confirm that Google has no problem finding your eCommerce store or website
- Ask Google to crawl and create a new index for a specific page or a website
- Troubleshoot common problems, such as whether your website is mobile-friendly
- Steer clear of spammy backlinks
- Find out the backlinks and use them to increase link juice
- Track your Core Web Vitals and your AMP Pages
- Identify which websites link to yours
- Examine the efficacy of Google’s search results in driving users towards your eCommerce platform
- Add sitemaps
- Request fresh content to be reindexed
Benefits Of Using Search Console
The best thing about this free tool is that it provides valuable information about website performance to owners or webmasters. This data allows them to optimise their site, affecting its appearance on search engines, particularly Google.
But is this tool as handy as Google claims it to be? The answer is yes! Since its inception, it has become a must-have tool for every SEO specialist, webmaster, and business owner.
Here’s a quick rundown of the benefits of using Google Search Console:
1. Improves The Search Appearance Of Your Website
Improving your website’s search appearance is the key to a successful digital marketing strategy, and creating a Google Search Console account will help you with that. Google Search Console allows users to change their site or a particular web page by previewing how they appear on the search engine results page.
Using this tool, you can start working on your website’s search appearance and evaluate the results. Google Search Console allows users to optimise URLs, titles, meta descriptions, site links and other aspects of your website. Once you’ve made the final changes, you can look at rich cards, standard search results, and snippets as a potential visitor would on the SERPs.
2. Increases Organic Search Traffic
Another benefit of using Google Search Console is that it increases organic website traffic, which is the primary reason for this tool’s popularity.
Distinctly, a whole segment of the tool is dedicated to investigating your site’s search traffic and presenting it as structured data. As is understood, this segment provides valuable information that sheds light on how visitors reach your website through organic search results.
The data from Google Search Console gives valuable insights into how the website performs, the top linked pages and the most popular search queries. Getting into the depth of these reports will help you understand your SEO strategy’s strong and weak points.
It’s advisable to scrutinise the data from search console reports in conjunction with Google Analytics for a holistic understanding.
3. Helps In Improving HTML Elements
Only a few know that Google Search Console helps improve website HTML elements.
That is to say, Google Search Console comes in handy in situations when you need to remember to add meta descriptions to web pages. You can add a meta description using this free tool while optimising it with relevant keywords.
Google Search Console also allows users to evaluate the title tags of their web pages. As a rule, each web page must follow a proper title tag hierarchy, with H1 or the Title tag at the top. This must be followed by other relevant headings such as H2, H3, etc.
4. It Makes It Easy For Users To Monitor Links
No business owner wants spammy websites linking to their web pages. Low-quality backlinks, or spammy backlinks, point to your website from low authority or spam sites.
s to disavowing backlinks, Google Search Console is the only reliable tool. That’s because it divulges details of links that lead to your website, including the anchor text. It even reveals the web pages that are commonly linked, enabling you to undertake suitable measures.
A critical SEO approach is link building, in which you focus on boosting the number of links to your eCommerce store from high-quality sources. This practice is most commonly referred to as backlinks.
Links from high-quality sites are essential because they help Google understand that your website is chock-full of valuable content. Google Search Console allows users to track their progress by assisting them in identifying new links to their website, link popularity, and volume changes.
How To Set Up Google Search Console: A Step-By-Step Guide
Assuming you’re a first-time Google Webmaster Tools user, you must face difficulty setting up your website. We won’t deny that using this free web service is slightly tricky, but it’s not impossible.
You need not possess expert-level knowledge to get started. Setting up Google Search Console is easy, provided your website is configured correctly and you can access it.
Here’s a detailed step-by-step tutorial on how to set up your account.
Step 1: Create A Google Search Console Account
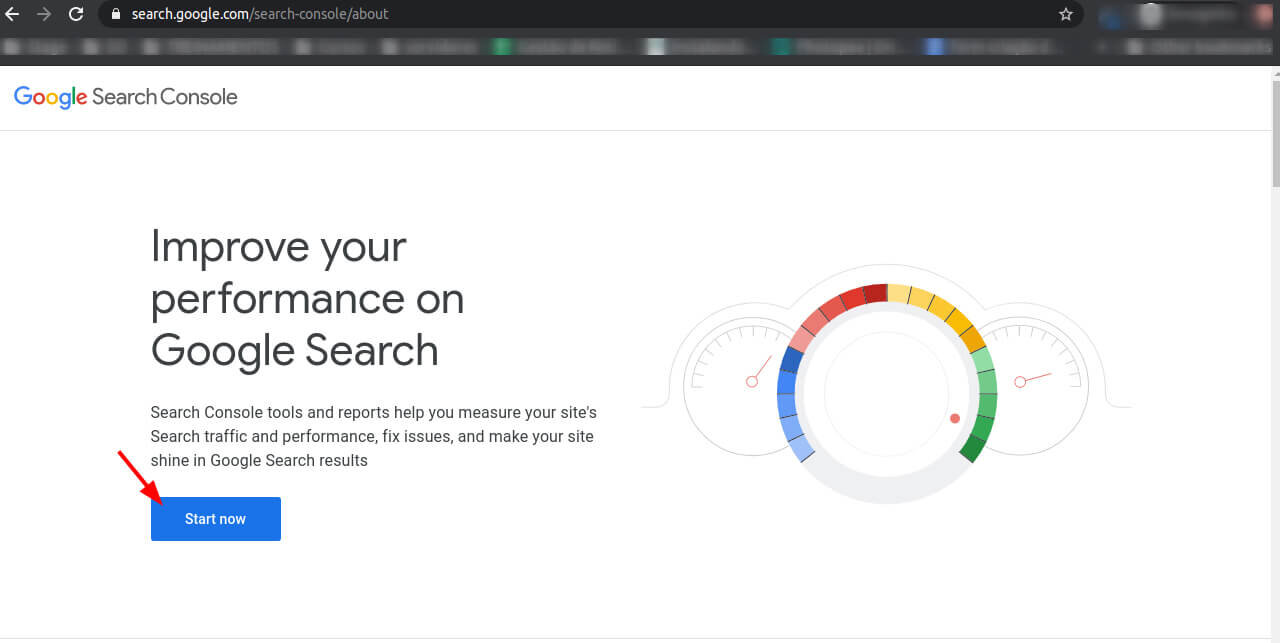
To start with Google Search Console, you must create a Google Profile account and add your website.
If your website is already connected to Google Sites, Google My Business, and Google Analytics, it’s ideal to use the same account to set up Google Search Console. This way, all your business-related properties will be in one profile rather than multiple Google accounts.
Those who still need a Google Profile account for their business must create one. Creating a Google Profile account is quite straightforward—visit the Google account sign-up page and set up your profile. You’ll be automatically assigned a Gmail address; however, you can link a non-Gmail address to your account if you wish to receive notifications on a different account.
Once you’re done with your Google Profile account, visit the Google Console Search page and use the login credentials to sign into the platform.
Step 2: Select Your Domain Type
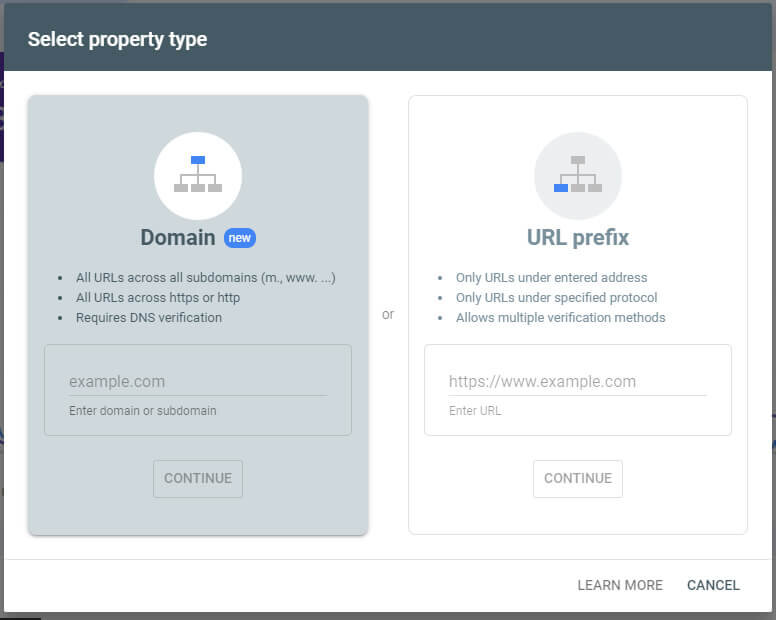
After successfully logging into your Google Search Console account, you can add a property using the domain or URL prefix option. Some experts suggest setting up Google Search Console via a URL prefix, while others suggest using a domain or URL option for setup.
When you use the former option to set up Google Search Console, your account will become a domain property, which means all properties will be under the same domain. Through this type, you’ll develop a single property that will include all protocol prefixes and subdomains connected with your domain.
After clicking on “Domain”, enter the root domain of your site in the empty field and hit “Continue”.
On the other hand, clicking on “URL prefix” will set up a URL prefix property and generate a performance report. In this type of property, you can set up a single property for only a single URL prefix of your eCommerce store. Remember that this domain type will connect your Search Console account to a single version of your site.
To create a URL prefix property, follow the same steps as you’d have done for setting up a domain-level property. Set up your URL prefix properties in the following manner if you wish to receive accurate data:
- https://www.yourdomain.com
- https://yourdomain.com
Step 3: Verify Site Ownership
After selecting your property type, the next crucial step in setting up Google Search Console is to verify the website’s ownership.
Without the verification process, getting started with Google Search Console is relatively impossible. Keep in mind that the verification process varies from property to property. Here, we’ll discuss the verification process for each property type for your convenience.
I. Verification For A Domain Property
Authenticating a domain property in Google Search Console can be achieved exclusively through your DNS provider or by leveraging DNS records related to the domain name.
In a domain-level property, you must input your domain provider name, such as networksolutions.com, and validate it by adding a CNAME record, a new TXT record, or directly through Google Search Console. Remember that DNS record updates can take up to 72 hours.
II. Verification For A URL Prefix Property
Numerous methods exist for verifying site ownership, apart from the domain name provider technique pertinent to URL prefix property. Among the myriad verification alternatives, Google endorses HTML file upload as the preferred method for website verification. Of course, your chosen method boils down to your preference and convenience.
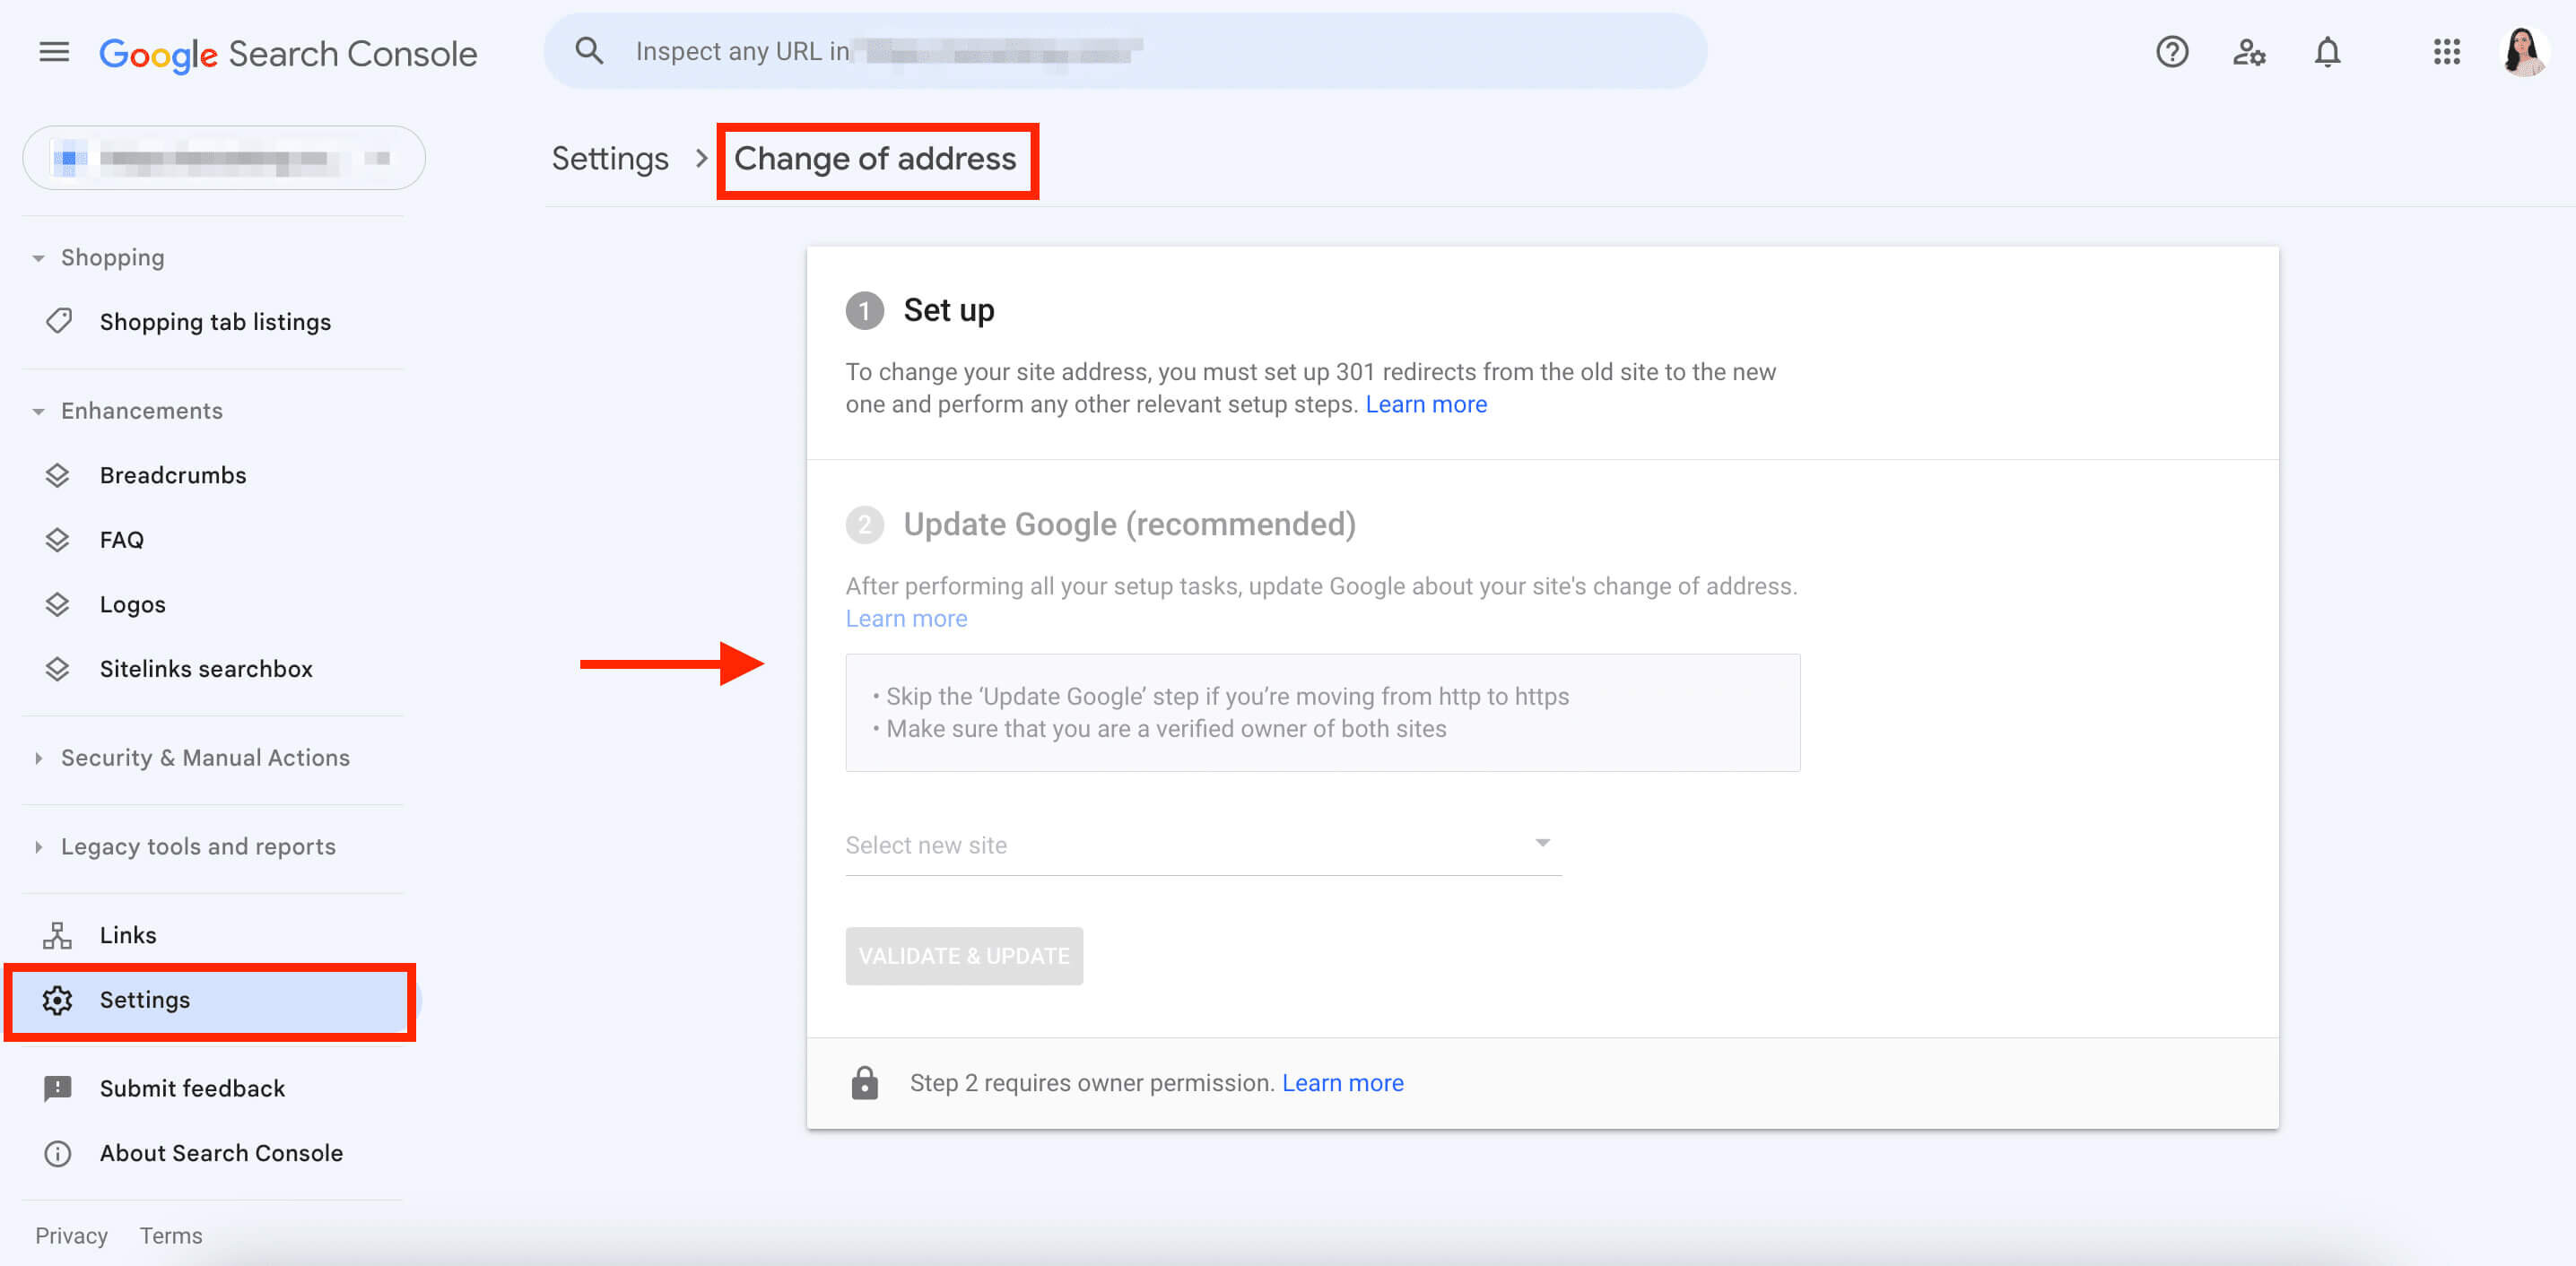
Here’s how you can verify site ownership via other verification methods:
III. HTML File
This method involves uploading an HTML file to your website’s root directory to prove ownership.
IV. Google Analytics Tracking Code
Another way you can verify your site is by using the Google Analytics tracking code. However, before you begin, ensure you have added a tracking code to your website.
All you need to do is open the verification box in Google Analytics and click “Verify”.
V. HTML Tag
If you prefer the HTML tag method for site verification, you must initiate by embedding a meta tag in your website’s section. Developer access to your site’s content marketing system is required for verification via HTML tag.
VI. Google Tag Manager
Verifying your site via Google Tag Manager is quite similar to that of Google Analytics, which means it can be done within minutes in just a few clicks.
In Google Search Console, open the Google Tag verification box and hit “Verify.” You should be able to see the verification status. However, it will work only if the Tag Manager snippet has already been installed on the site and the permissions are set to “Publish.”
Step 4: Submit Your Sitemap
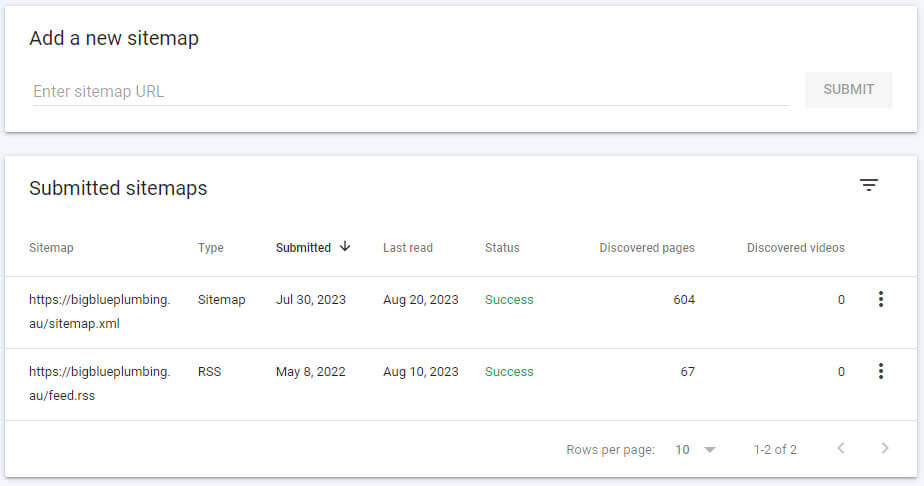
After verifying your ownership in Google Search Console, the next step is to submit your XML sitemap.
Though not obligatory, supplying an XML sitemap can enhance the crawl ability of your website, thereby facilitating the indexing process and acting as a significant ranking aspect for search engine optimisation.
On the left-hand side menu of the Google Search Console platform, search for “Sitemaps” and add or paste the URL of your sitemap’s location. Google doesn’t take too long to pay attention to the URLs submitted; it notices them immediately. And no matter how many URLs you submit, Google will crawl and index them within a few days.
Step 5: Navigate Google Search Console
Coming to the next step, it’s time to navigate Google Search Console. Here’s what you should do after you are finished setting up:
I. Index Coverage Report
Look at the index coverage report to troubleshoot issues with indexed pages. The index coverage report in Google Search Console reveals the status of every valid page or URL that Google has tried to index on your website.
Usually, they will be assigned one of three statuses: warning, error or excluded.
II. Review Submitted Sitemaps
After the index coverage report, check the XML sitemaps you submitted while setting up the Google Search Console. Reviewing submitted sitemaps will help you detect errors that can be corrected quickly.
III. Links
Click on the “Links” tab on the left sidebar to access web domains that link to your web pages. Inspect external links and internal links to ensure your site or individual web pages are not associated with low-quality sites.
IV. Mobile Usability
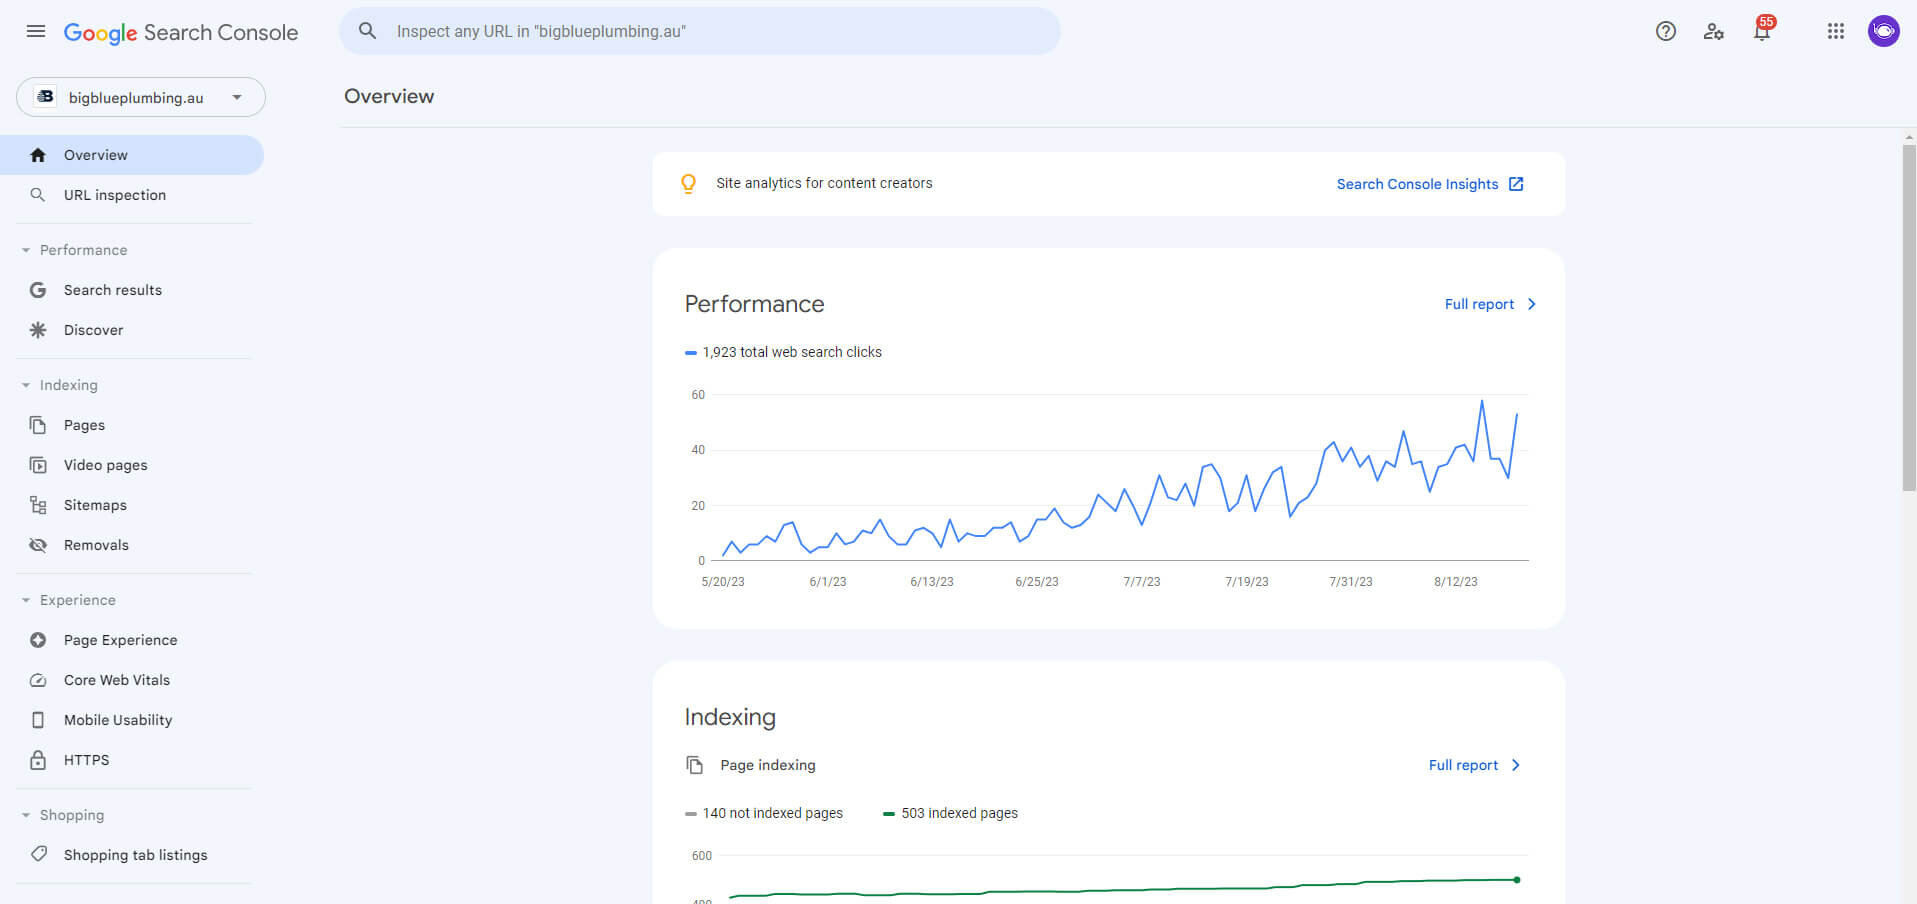
Navigate to the mobile usability tab to execute a mobile usability test and ascertain whether your web pages are fully optimised for mobile users. Also, check the site speed on both desktops and mobile devices to determine the page loading time.
You can also check mobile keywords to optimise accordingly. Your visitors use these words or phrases to search for your brand through mobile phones.
V. URL Inspection Tool
Formerly known as Fetch As Google, the URL inspection tool is helpful since you can test how Google crawls and displays a particular URL on your website. With this tool, you can ensure that Googlebot can’t reach web pages.
Also, you can click on “View tested page” to see crawl errors, a screenshot, or an HTML.
VI. Search Type
By clicking the “Search type” option, you’ll see data revealing whether your users reach your site using image search, video search, Google News, or keywords.
VII. Position Filter
Want to know your website’s position in the topmost results? Try the position filter to give you the average position of your site’s highest-ranking pages.
How To Use Google Search Console For Website Optimisation
1. Analyse Search Traffic
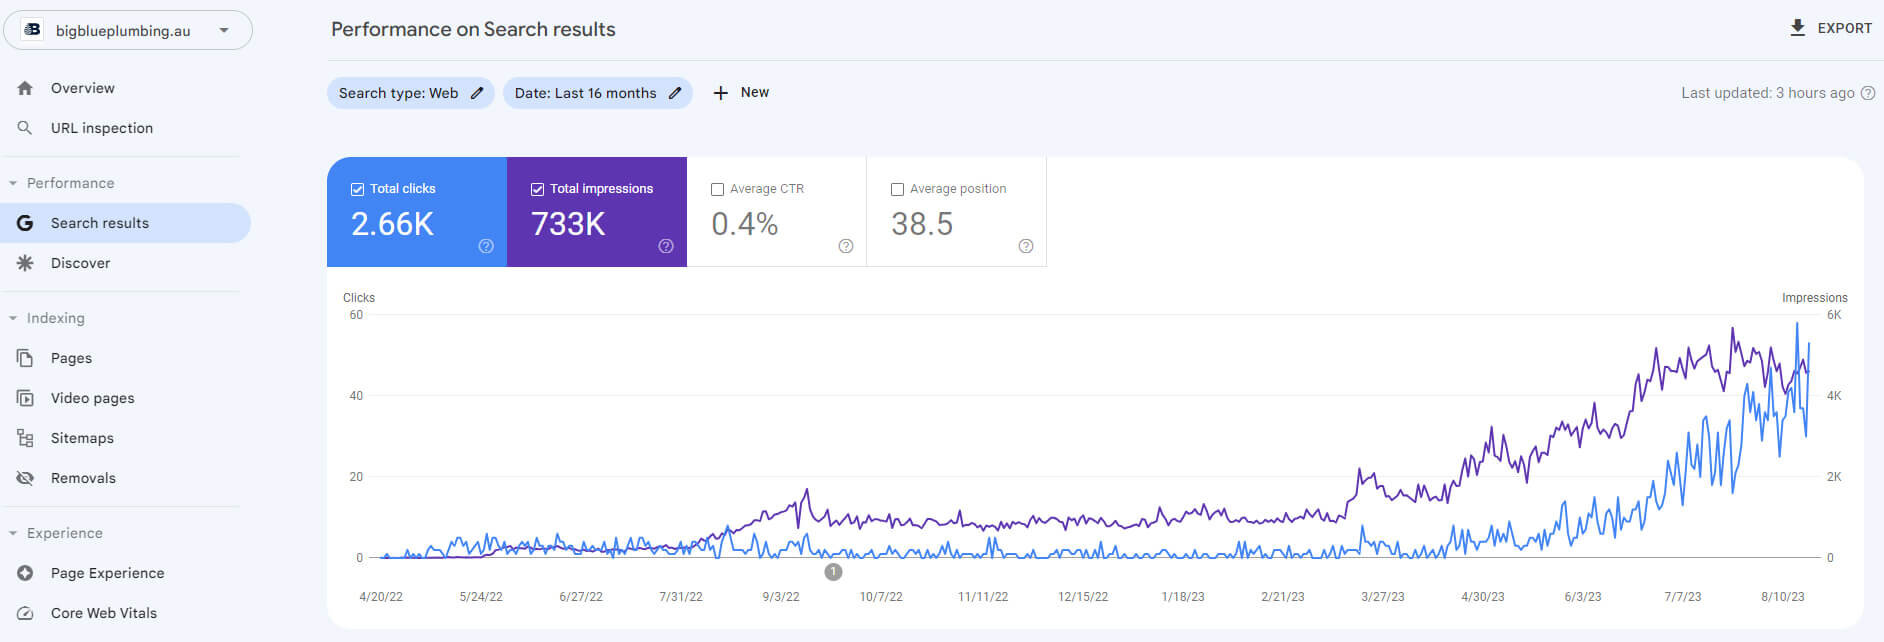
Google Search Console allows users to analyse search traffic by accessing performance reports. The performance data report gives businesses insight into how their website performs in Google Search Results.
For instance, you can learn how organic search traffic modifies over time, as well as its source and the search queries likely to lead the users to your website.
Likewise, you can find the pages with the highest and lowest click-through rates from the SERPs. As already mentioned, Google allows businesses to improve mobile targeting by providing them with information on the queries used by people researching your brand or products.
2. Fixing Website Errors
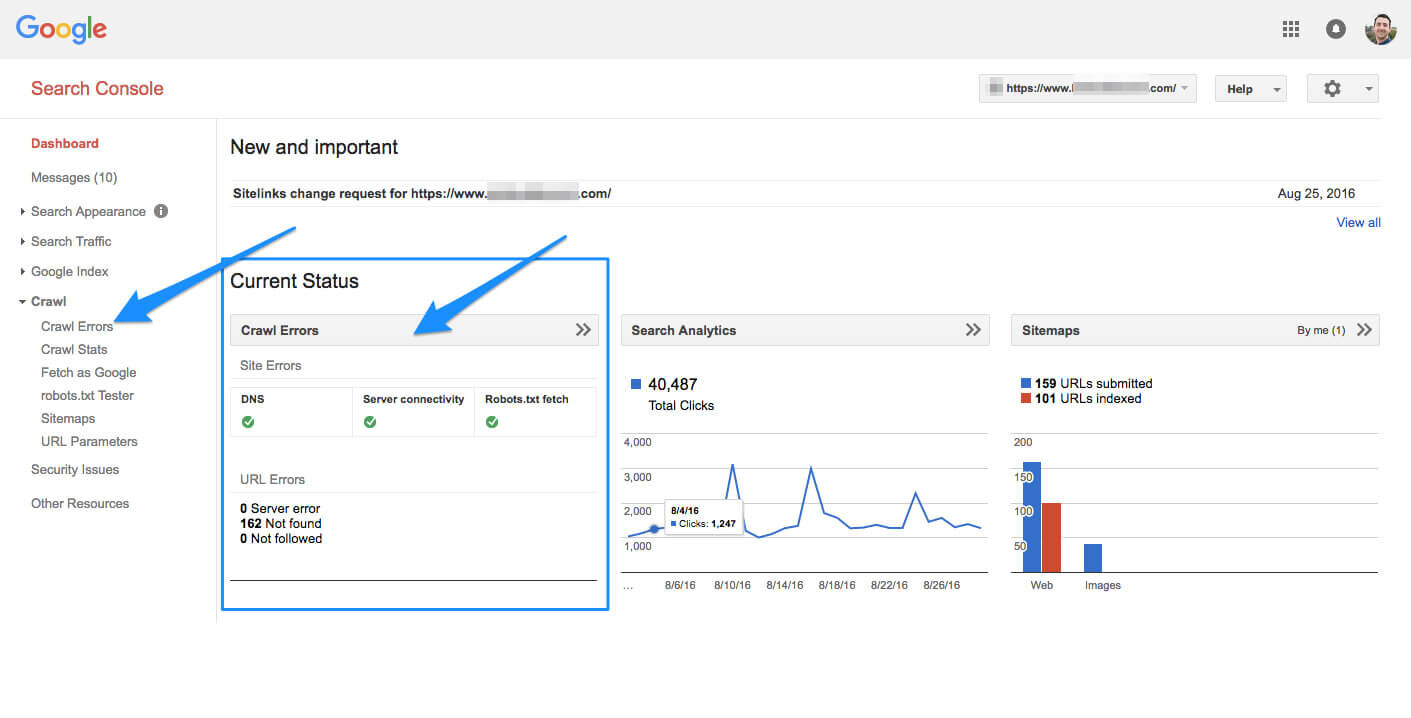
You can monitor indexed pages and identify indexing errors with Google Search Console.
To do that, click on “Coverage” after clicking on “Overview” while making sure the following are selected:
- Excluded
- Valid
- Warning
- Valid with warnings
Changes in the site template are primarily to blame for indexing issues. However, if you submit a sitemap that contains URLs Google has difficulty crawling, indexing issues may occur.
Take a look at the excluded pages to troubleshoot indexing issues. If there’s a typing error, you can edit the URL; otherwise, you’ll have to redirect or remove it.
3. Improve Website Rankings
Two ways to improve website rankings are as follows:
I. Optimise Content That Doesn’t Get Clicks
Google Search Console data disclose information about which content pieces rank well in the SERPs but only get a few clicks. If your page garners substantial impressions, it appears in the search results for users but fails to stimulate a satisfactory click-through rate.
Because they rank high in the search results, you can increase the number of clicks by optimising the pieces of content. This, in turn, will drive more traffic to the site.
Title tags and meta descriptions are often responsible for low clicks, so optimise them. Also, make sure the title tag is compelling and SEO-friendly.
II. Identify Performance Drops
Performance reports are also helpful in identifying performance drops. In other words, this free web service can help you understand how many times your site appeared at the bottom.
This feature of Google Search Console helps spot trends in clicks, impressions, and search traffic. Optimising content is the only solution to improving the ranking of your web pages and attracting organic traffic.
Setting Up Google Search Console The Right Way
To sum it up, setting up Google Search Console is relatively straightforward: create an account on the platform, select your property type, verify it, submit sitemaps and navigate it. Before moving to advanced functionality, understanding the basics of the platform is essential, or you’ll keep getting stuck.
Once your account has been set up, navigate the platform properly via the dashboard on the left-hand side. Insights are powerful; paying proper attention to them can help you identify errors preventing your site from ranking high in the SERPs.
After studying the data, ensure you spend adequate time optimising keywords, meta descriptions, title tags, images, and other aspects. Ultimately, your site will rank high in SERPs, and organic search traffic will increase.
Frequently Asked Questions
Q1. How many users can I add to Google Search Console?
On Google Search Console, business owners can add up to 100 users. To add a new property, search for “users & settings” after heading over to “settings” and then select “add user.” Subsequently, enter the user’s email address and select the permission level.
Q2. How long does it take for Google Search Console to index a site?
In most cases, Google crawls and indexes sites within a few days; however, it may take a few weeks to index a site in some situations. If Google takes a long time to index the site, do not resubmit the same URLs repeatedly, as this will not speed up the procedure.


